NotionAPI and Next JS
Using Notion as a CMS for your projects

I also write about what I'm learning and building on this blog—most of them about programming, technology and documentation.
In this tutorial, you will be learning how to work with the NotionAPI together with NextJs. At the end of this article, you will be able to fetch data from Notion and display that data on your website. Basically, you will learn how to use Notion as your Content Management System(CMS) in powering your blogs or portfolios.
Requirements
- You will need to have Node installed, to be able to use NPM or Yarn alternatively.
- Notion Account (The free version will do)
- Text Editor (VS code)
- Basic Knowledge of NextJS
Objectives
The objective of this article is to help you understand
- How to use Notion as a CMS for your Projects.
- Understand NotionAPI work and how to make requests to the API using NextJS
- Working with your console in debugging and checking API response
- Understand how getStaticProps works
Notion is no longer just a platform that you use to take notes, create todos, or write blog posts, it is a lot more powerful than that. with the introduction of NotionAPI in May 2021, Notion unleashed a world of new possibilities. You will be exploring some of these possibilities in this article.
NOTE: it is important to state that this article does not cover all used cases of the NotionAPI, the essence of this article is to give you a basic knowledge of what is possible with the NotionAPI.
Create a new Notion Integration
Before diving into the code, you will need to setup up everything you need on your Notion, I will explain this stage step by step
- Before creating a new integration you will first need to have a Notion account, go to Notion to create an account or Login if you have an account already. The free version works fine
- After logging in, you can now proceed to create a new notion integration, you can do this by visiting https://www.notion.com/my-integrations. For this article, you will just need to provide a name for the integration and click on save changes. For a more detailed step by step guide, go to the notion docs here.
If you follow all the steps accurately, you should have something similar to this
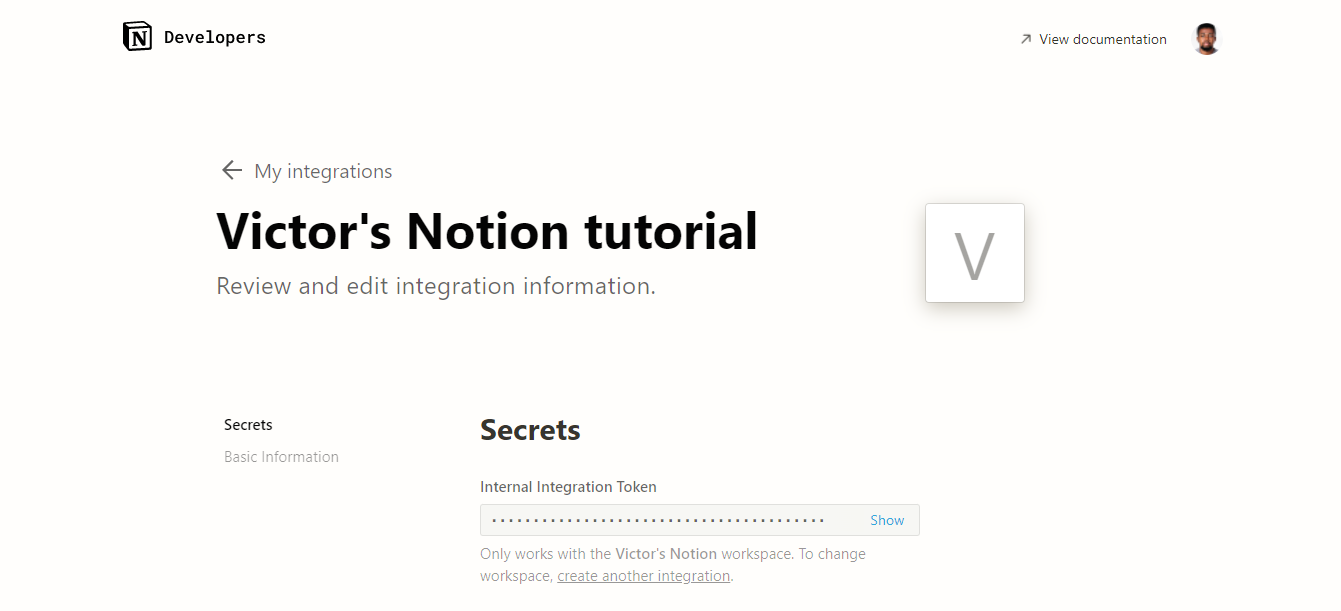 copy the secret Internal Integration Token and save it somewhere. Ensure you scroll down and click on save changes.
Create your Notion Database
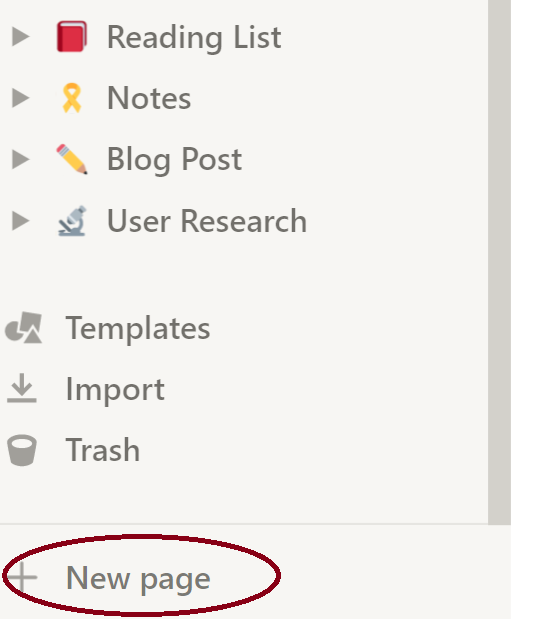
- Go back to your logged-in Notion account here, on the left-hand side of your screen, you will see a menu, click on New Page from the menu options.
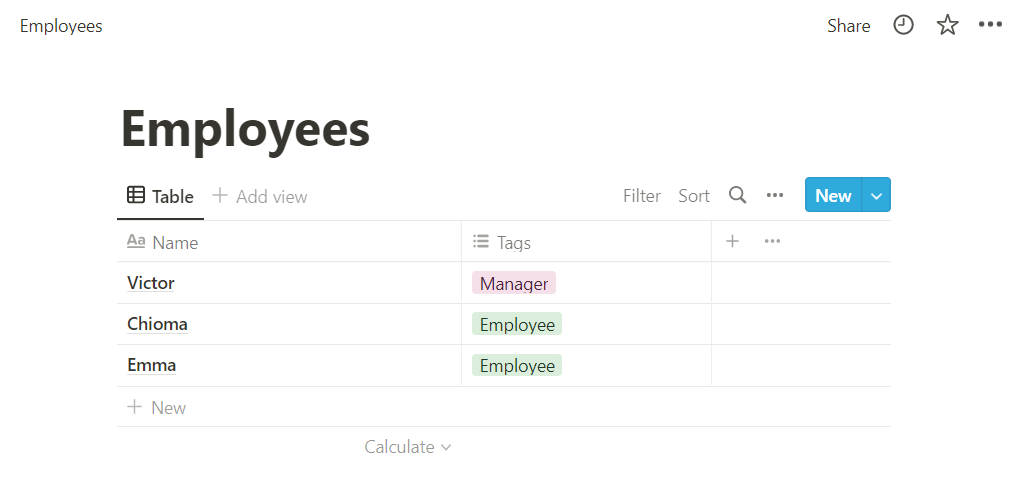
- After clicking on New Page, a new interface should appear, give it a name (I named mine Employees), then under database, select table. you should have something like this.
I know you can't wait to dive strength into the code, but it's also important we have this part covered.
Link Database to Integration
After you have created your employee's database, it's time to link this database to the integration you created in step 2.
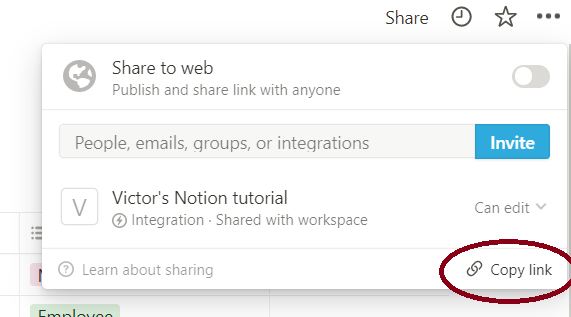
- Click on share, and a modal will pop up
- Click on Invite, and another modal will pop up
- Select the Integration you created in step 2. I named mine <Victor's Notion tutorial> You have successfully linked your database to your Integration, What this means is that you have given access to the NotionAPI to be able to fetch data from the database you created.
Getting your Database ID
You will need to get the unique ID of your employee's database, Each page you create in Notion has a unique ID, there are two ways to get your ID.
- Click on share and a modal will pop up, you should see copy link, click on it to copy the link.
- If you are using a browser and not the Notion Desktop Application, you can get your database ID from the database URL.

Paste the copied link into your text editor, the whole link is not the Database ID, but the link contains the Database ID. In my own case, this is my copied URL
 the highlighted part is the ID of my Database. Cut the Database ID out and paste it somewhere, you will be needing it soon.
Now, you should have your Secret Internal Integration Token and Database ID. You can now proceed to the code.
Project Setup and Code
Before we you begin coding, you need to setup your NextJS project, do this by following these few steps:
- Open your command terminal
- cd into your desired directory
- run
npx create-next-app notionapi-tutorialuse any project name you prefer, I used ``notionapi-tutorial as mine - After the installation is complete, cd into the project directory. e.g
cd notionapi-tutorial - run
npm install @notionhq/clientto install Notion Client you will be needing it to initialize a notion client. - open your project on your code editor, if you're using VScode use,
code .to open your code editor directly from your terminal.
Create a .env file
Inside your project root directory, create a .env file. The file will house your Secret Internal Integration Token. This is how your folder structure should look like
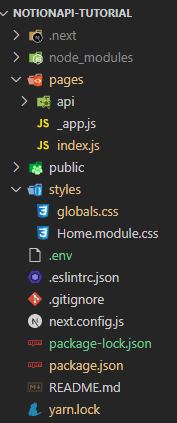 inside your
 .env file save your secret internal Integration like this.
NOTION_ACCESS_TOKEN="secret_PxgG8c3bmVm9ZZXR0kQ595uyr8beFN6OEV3HfcrfcEF"
NOTE: .env or .env.local are used to save secret keys. Don't push your .env file to Github. By default, NextJS .gitignore will prevent this file from being pushed to an online repository like Github.
Clean up your index.js file
Empty your index.js file, for starters, your index.js file should only have this code below
export default function Employees() {

  return <div></div>
}
Using the getStaticProps Method
getStaticProps is a method in NextJs, it is used when the Data will be coming from a headless CMS which is what you are about to do and a lot more other things. See the NextJS Documentation for other uses of getStaticProps
inside your index.js file, import Client and create a getStaticProps function
import { Client } from "@notionhq/client";


export default function Employees() {

  return <div></div>

export async function getStaticProps() {
  const notion = new Client({ auth: process.env.NOTION_ACCESS_TOKEN });

  // passing your database id
  const databaseId = "c2085328946447ed80cc67c251b24843";
  const response = await notion.databases.query({
    database_id: databaseId,
  });

  console.log(response);
}
- You are using the getStaticProps method to get your Notion access token from
.envand to use that access token to fetch data from Notion const notion = new Client({ auth: process.env.NOTION_ACCESS_TOKEN });creates a new Notion Client.- In your
const databaseIdvariable you are assigning it to the Database ID that you created for your employees. You remember your Database ID right? - Your response variable should be set to
awaitbecause this is aasyncfunction, we need to wait for this call to return data before we continue.
The console.log(response) is to help you check if you are getting a response from the database, so go to your terminal console to see if there is a response. Here is mine
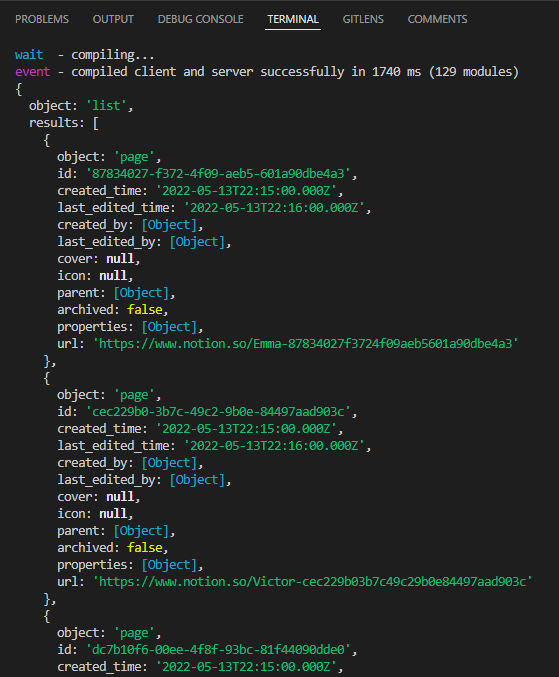
This response is the entry you had in your database, you might see an error like this on your browser or terminal
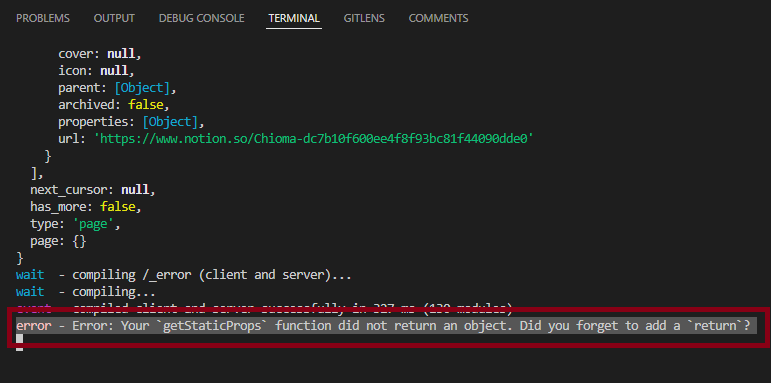 Don't worry about that error for now, as long as you are getting your response on the console, you are good to go.
Now you need to do something with the response you are getting, so the getStaticProps method will return props which you are going to set to the response you got. just like this;
This is the complete code for the getStaticProps Method
import { Client } from "@notionhq/client";


export default function Employees() {

  return <div></div>

export async function getStaticProps() {
  const notion = new Client({ auth: process.env.NOTION_ACCESS_TOKEN });

  // passing the database id
  const databaseId = "c2085328946447ed80cc67c251b24843";
  const response = await notion.databases.query({
    database_id: databaseId,
  });

  console.log(response);
// the method returns props
  return {
    props: {
      results: response.results
    },
  };
}
Render the Results
You are making progress, now that you have your response assigned to your results,
- You will need to pass in
resultsinto your Employees component as aprops, this will enable you to use the results within yourEmployeesfunction - Also import a
useEffect, inside your useEffect function, console.log theresultsThis is how your code should look
import { Client } from "@notionhq/client";
import { useEffect } from "react";


export default function Employees() {

  useEffect(() =>{
    console.log(results);
  });

  return <div></div>

export async function getStaticProps({ results }) {
  const notion = new Client({ auth: process.env.NOTION_ACCESS_TOKEN });

  // passing the database id
  const databaseId = "c2085328946447ed80cc67c251b24843";
  const response = await notion.databases.query({
    database_id: databaseId,
  });

  console.log(response);
// the method returns props
  return {
    props: {
      results: response.results
    },
  };
}
Debugging using your browser console
Spin your project on your browser by running npm run dev or yarn run dev. You should see a blank page for now, but when you open the browser console, you should be able to see an array of 3 objects.
The Array has 3 objects because the employee database created earlier has 3 data. when you expand the array you should be able to see the data in more detail. under properties, you should see two fields which are the Name and Tags fields which are the exact fields that were created in the Notion Employee database.
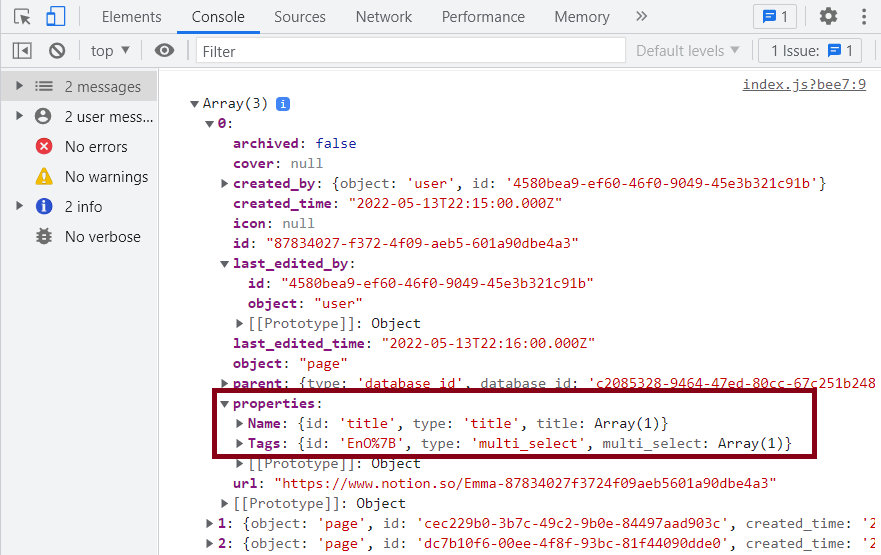
Expand the Name field, and located where the Employee name is. For you to be able to render that name on the browser, you will have to note the various fields the name is nested in.
I highlighted mine below, to serve as a reference for you.
 Expand the Tags also, and located tags, I also highlighted the various nested fields
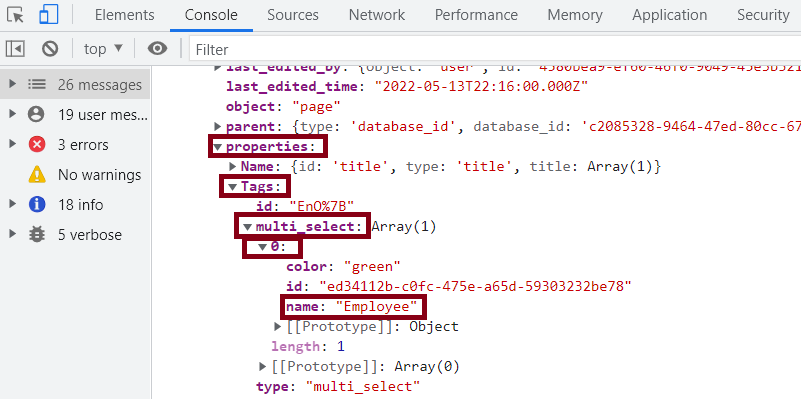
The levels I underlined are what you will use in our code to render the Name and Tags on the Browser, so take note of them.
getDatabaseDisplay function
Now that you know how the object is structured, you can go ahead with the final steps.
- create a function
getDatabaseDisplayinside yourindex.jsfile, that will display all of your employees' Names and Tags. - Pass the
getDatabaseDisplayfunction into thedivof your Employee component.
this is how the getDatabaseDisplay function will be
const getDatabaseDisplay = () => {
    let jsx = [];
    results.forEach((employee) => {
      jsx.push(
        <div className="card" key={employee.id}>
          <p>{employee.properties.Name.title[0].plain_text}</p>
          <span>{employee.properties.Tags.multi_select[0].name}</span>
        </div>
      );
    });
    return jsx;
  };
The whole project code
import { Client } from "@notionhq/client";
import { useEffect } from "react";


export default function Employees({results}) {

  useEffect(() =>{
    console.log(results);
  });


  const getDatabaseDisplay = () => {
    let jsx = [];
    results.forEach((employee) => {
      jsx.push(
        <div className="card" key={employee.id}>
          <p>{employee.properties.Name.title[0].plain_text}</p>
          <span>{employee.properties.Tags.multi_select[0].name}</span>
        </div>
      );
    });
    return jsx;
  };

  return <div>{getDatabaseDisplay()}</div>
}

export async function getStaticProps() {
  const notion = new Client({ auth: process.env.NOTION_ACCESS_TOKEN });

  // passing the database id
  const databaseId = "c2085328946447ed80cc67c251b24843";
  const response = await notion.databases.query({
    database_id: databaseId,
  });

  console.log(response);
  return {
    props: {
      results: response.results
    },
  };
}
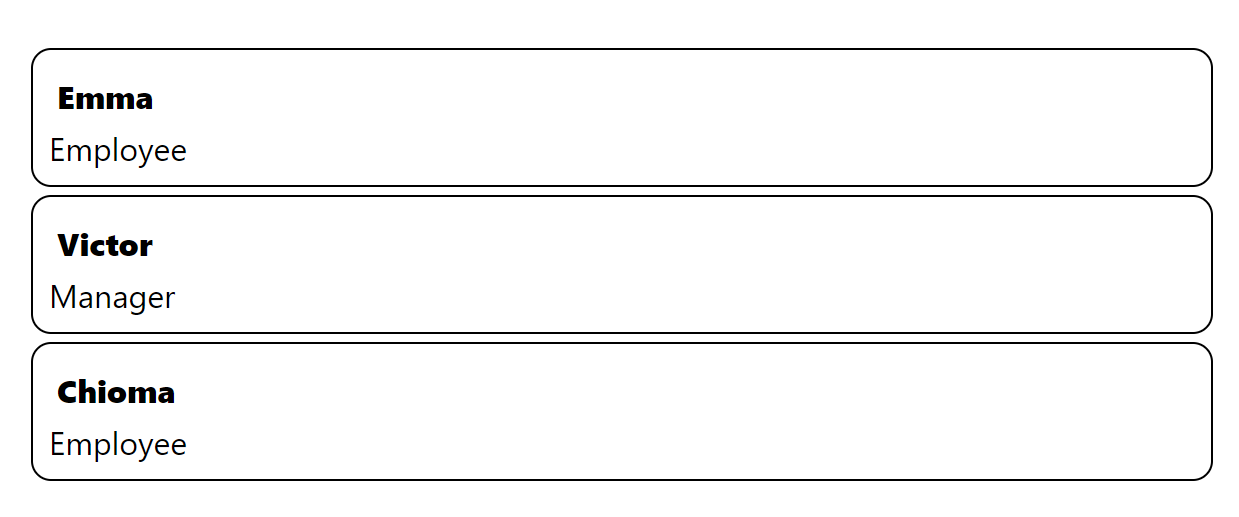
Congratulations, you now have a project completely powered by Notion, this is how mine looks on my browser. I added a few lines of CSS to make it look better, if you need it, go to the repository of this project, under globals.css here
As I stated earlier, This article doesn't cover all the used cases of the NotionAPI, this article is just to give you an idea of the wonderful things you can achieve with Notion. I have linked relevant resources below, go and explore them, If you have any questions about the NotionAPI, I will gladly answer them or direct you to resources that will. Thank you.
Relevant Resources


